Difficulty
Very Easy
How to set your road bike's saddle height
Saddle position has a big impact on pedalling efficiency and injury prevention, so it's important to get it right
Tom Hallam-Gravells
Online Production Editor

Manon Lloyd
GCN Tech Presenter
The youngest, most successful and by far the coolest presenter
There are lots of adjustments you can make to alter the fit of your bike, but the height of the saddle is the most important. Even if the position is a few centimetres out, it can have a big knock-on effect, leading to an uncomfortable ride.
In this guide, we'll take you through a few different methods for finding the correct height, but before that, here are a few things to be aware of.
- Read more: How to find the perfect bike fit
Why saddle height matters
Saddle height has a large influence on both comfort and performance. Once in the correct position, you should be in the most efficient pedalling position, and you are less likely to pick up an injury.
If the saddle is too high, you may start rocking at the hips as your feet are stretching for the pedals. You may find that you have to straighten your legs completely to reach the bottom of the pedal stroke. Not only is a high saddle inefficient, it's also a fast track to an injury, usually a knee injury.
If you're stretching for the pedals, it's also going to put extra pressure onto your rear end, leading to plenty of discomfort and, even worse, potentially saddle sores.
A saddle that is too low is less likely to cause problems with your joints, but it is still inefficient. Additionally, a low saddle can make you feel cramped on the bike, which can become uncomfortable, especially over longer rides.
Don't emulate the pros
When hunting for the correct saddle position, many riders automatically emulate the pros. That's understandable as they know what they're doing, right?
It doesn't quite work that way. Pros spend far more time on a bike than the rest of us, and when they're not on a bike, they will probably be doing stretching and conditioning. That means that their bodies are far more accustomed to a road bike position, so they can edge their seat up a little bit to give a greater leg extension.
Even if you want a performance edge, this probably won't work for you. Without the hours on the saddle, and the focussed conditioning, a higher saddle will cause your hips to rock, it'll put more pressure on your backside, and it'll make you slower and less comfortable.
If in doubt, get professional help
The steps below should get your saddle in the right place, but they might not work for you. Everyone is different, so if our methods leave you feeling uncomfortable, head to your local bike shop for a professional bike fit. Many shops have fancy tools that measure your position on the bike which will help to identify any issues and rectify them.
With that out of the way, let's look at how to find the correct saddle position. The first two steps are differing ways to alter your saddle height, so test both and see what works best for you. The final two steps cover saddle setback and angle.
Tools Needed

Step 1A
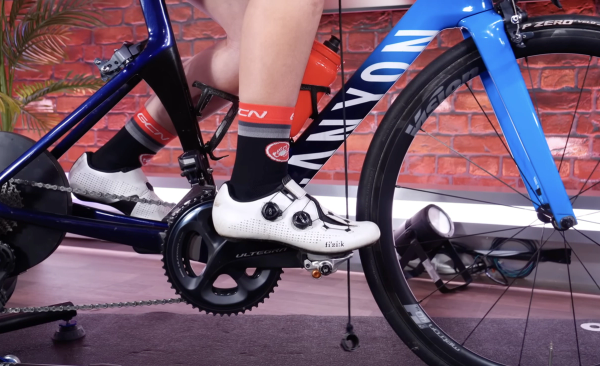
Saddle height method 1: Heel to pedal
Sit on your bike and place your heel on the pedal. Rotate the crank arm to six o'clock so that it is in a straight line with your leg. Your leg should be locked out but your heel should still be on the pedal.
Top Tip
Before you start, if you are adjusting your saddle height on a current bike, take some quick measurements of the height and reach. This way, if you don't get along with your new adjustments, you can always go back to the old one.

Step 1B
Saddle height method 1: Make adjustments
If your knee is slightly bent, this that means you need to increase your saddle height, but if your heel is losing contact with the pedal or you're rotating your pelvis to touch the pedal, then this means you need to lower it.
Give the bike a quick ride to check, and make small adjustments until you're happy with your saddle height.
Step 2A
Saddle height method 2: The Lemond method
Some riders achieve better results using this alternative method, which relies on the measurement of your inseam.
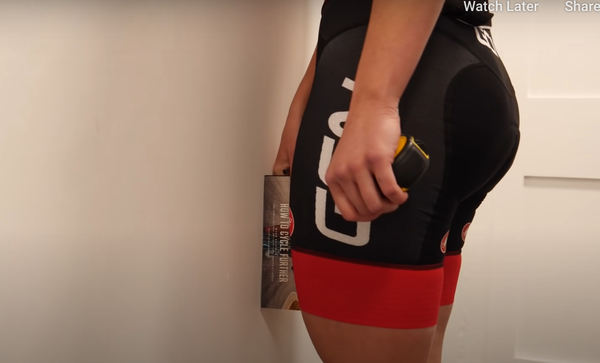
Wearing your cycling shoes, stand against a wall. Hold a book between your thighs and bring it up to the inseam. Then, either get a helper to measure from the ground to the top of the book, or make a little pencil mark on the wall at the top of the book for you to measure yourself.
Step 2B
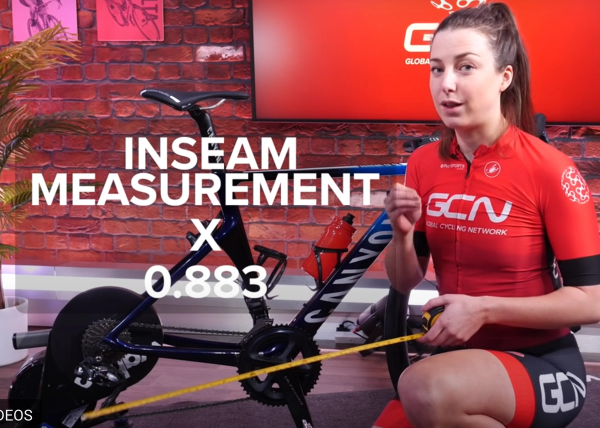
Saddle height method 2: Multiply measurement by 0.883
Once you’ve got the measurement, multiply it by 0.883. The resulting number is the measurement you need from the centre of the crankset to the top of the saddle.
Top Tip
This will get you in the right ballpark, but there are some other factors that might move your optimal position up or down a few millimetres. For example, how long your cranks are, or if you pedal with your toes pointing down slightly.
Step 3A
Set the fore/aft
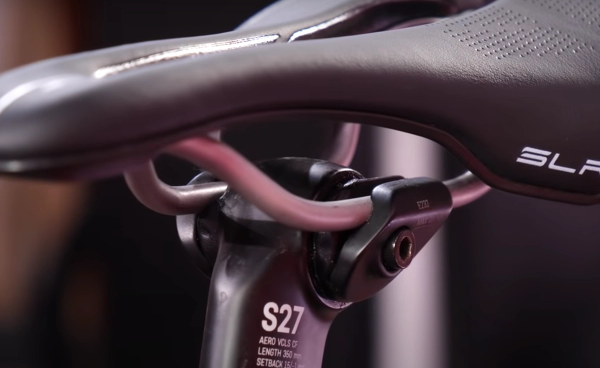
Once you’ve set the height, you need to adjust the fore and aft, which is how far forwards or backwards the saddle is positioned on the rails.
The ideal position is to have your knee directly above the pedal spindle when the pedal is in the three o'clock position. You can easily adjust this by undoing the bolts under the saddle and sliding it forwards or backwards until you achieve this knee position.
Step 3B
Fore/Aft position: Measure your knee position
To measure your knee position, you're going to need a plumb line, which is simply a weighted object on the end and a piece of string. Sit on your bike and place your cranks in the three o'clock position. Take your plumbline and place it at the very front of your kneecap and then it should drop to where the crank arm meets the pedal.
Top Tip
Remember, changing the fore/aft could affect the optimal saddle height.
Step 4
Set the saddle angle
Most people prefer having their saddle parallel to the ground, but some riders choose to point their saddle either slightly down or slightly up. Now you’ve set the height and position of your saddle, consider whether you would like to tilt the saddle at all. It’s something best found out by testing.
.jpg?w=600&auto=format)
Related Content

Beginner indoor training session: 20-minute sweet spot indoor cycling workout
If you're new to indoor training, this is a good session to start with. No super hard efforts or high cadences, just a good, entry-level session that will burn calories

How to change the stem on a road bike
A new stem can transform the fit and feel of a bike. Here’s how to replace a stem on a road bike

Take it easy! 25-minute aerobic indoor cycling workout
A steadier workout for low-intensity days, or for building into your indoor cycling gradually

VO2 max surges: 30-minute GCN indoor training session
Hank guides you through three five-minute blocks, each with a hard VO2 Max effort sandwiched between two sweet spot efforts